

304 vs. 316 Stainless Steel: Which Grade Does Your Project Need?
The short answer on 304 vs 316 stainless steel: 316 contains molybdenum, and 304 does not, which makes 316 noticeably better at resisting chlorides. Chlorides mean salt, pool chemicals, road salt, and some cleaning products. For a kitchen counter, a prep table, or an indoor architectural piece, 304 is the standard choice and performs beautifully. For anything living next to a pool, a lake, or a chemical washdown, 316 earns its higher price. Most projects are more obvious than the comparison makes them sound.
What’s the Difference Between 304 vs 316 Stainless Steel?
Both are austenitic stainless steels, so they look the same, form the same way, weld with the same processes, and take the same finishes. Side by side on a bench, you could not tell them apart.
The difference is in the alloy. Both rely on chromium to form the passive layer that resists corrosion. 316 adds molybdenum to that mix, and molybdenum is specifically good at protecting the passive layer from chloride attack. That is the entire practical distinction, and it only matters where chlorides are present.
You will also see 304L and 316L. The L means lower carbon, which reduces a specific risk in welded assemblies. If your part has significant welding and will sit in a corrosive environment, it is worth asking whether the L variant is appropriate.
Where Is 304 the Right Call?
In most places, honestly. 304 is the workhorse grade and covers the majority of fabricated stainless work.
Indoor kitchen counters, islands, and backsplashes. Commercial kitchen prep tables and equipment stands. Architectural panels, railings, and interior fixtures. Food service surfaces that get cleaned with normal commercial products. General outdoor use away from salt water and heavy de-icing exposure.
Specifying 316 for an indoor kitchen is not a mistake so much as money spent on protection the environment will never test.
When Is 316 Worth the Premium?
When chlorides are part of daily life for that surface.
Pool houses, pool decks, and anything downwind of chlorinated water, where chemistry in the air reaches the metal whether it gets splashed or not. Lakefront and coastal properties. Outdoor kitchens that see heavy road salt carried in on shoes or vehicles. Lab and processing environments where chloride-based cleaners or solutions are in routine use. Marine hardware of any kind.
The pattern to notice: it is rarely about how wet the surface gets. It is about what is dissolved in the water.
Grade
Outdoors raises the stakes, though not simply because of weather. Rain alone does not attack stainless. A covered outdoor kitchen in a rural setting is a mild environment for 304, and plenty of them run for decades on it.
What changes the calculation is proximity to a chloride source. An outdoor kitchen twenty feet from a saltwater pool is a harder environment than one exposed to open weather and nothing else. In a Wisconsin context, road salt is the factor people underestimate, particularly on anything near a driveway, an entry, or a garage.
Cost & Availability
316 costs more, driven by molybdenum and a higher nickel content, and the gap moves with commodity pricing rather than staying fixed. Expect a meaningful premium rather than a rounding difference.
Availability also differs by form. 304 is stocked more widely in more thicknesses and finishes, so a 316 job can carry a longer lead time depending on what the piece requires. If your schedule is tight and the environment does not demand 316, that is worth weighing. Ask your fabricator what is on hand before assuming either grade is equally quick.
How Do You Decide Without Over-Specifying?
Describe the environment rather than naming a grade. Where does the piece sit, what gets splashed on it, what cleans it, and what is in the air around it? A fabricator can map that to a grade quickly, and the conversation usually takes a minute.
Two things are worth remembering either way. Neither grade is rustproof, and both perform better when surfaces get cleaned rather than left to sit with residue on them. And most rust-colored spotting people find on stainless is contamination from another metal rather than the stainless itself corroding, which no amount of upgrading the grade will prevent.
Common Questions About 304 vs 316 Stainless Steel
Can you tell the two grades apart by looking?
No. They are visually identical in the same finish. Grade is confirmed by mill documentation or testing, not by appearance.
Is 316 always the safer choice if budget allows?
It is the more corrosion-resistant choice, and in a chloride-free indoor environment it delivers nothing 304 would not. Spending the difference where it does not apply is the more common error than under-specifying.
Do the two grades weld together?
Yes, with appropriate filler selection. Flag mixed-grade assemblies early so filler and post-weld finishing are planned rather than improvised.
Does grade affect how a piece is finished?
Not meaningfully. Both take brushed, polished, and textured finishes the same way, so appearance is not a reason to choose one over the other.
Not Sure Which Grade You Need?
Tell us where the piece will live and what it has to survive, and we’ll follow up with a clear quote, fast.
Design for Manufacturability: How to Design Metal Parts That Are Easier to Fabricate
Design for manufacturability means drawing a part so it can be made efficiently with the processes that will actually make it. The same function can often be delivered two ways, one of which costs noticeably more to produce, and the difference is usually decided on the drawing rather than on the shop floor. Tolerances tighter than the part needs, holes placed too close to a bend, a joint no welder can reach, and material chosen against the process account for most avoidable cost in fabricated parts.
What Makes a Part Expensive to Fabricate?
Rarely the thing people expect. Raw material is often a minor share of the total on a fabricated part. What drives cost is operations, setups, and risk.
Every additional process step adds handling. Every repositioning in a fixture adds a setup. Every tolerance tight enough to require inspection adds time and scrap exposure. A part that looks simple can carry six operations, and a part that looks complex can carry two. Counting operations rather than judging appearance is the useful instinct.
Are Your Tolerances Tighter Than They Need to Be?
This is the single largest source of unnecessary cost, and it usually comes from caution rather than requirement. A tolerance copied from a template, or tightened because it felt safer, quietly commits the shop to slower processes and added inspection on features where nothing was ever at stake.
The productive habit is asking, feature by feature, what the tolerance is protecting. A hole that clears a bolt does not need the tolerance of a hole that locates a bearing. Tighten what matters functionally and open up everything else. A drawing where a few features are tight and the rest are general tells a shop exactly where to spend attention.
Where Should Bends and Holes Sit Relative to Each Other?
Metal stretches on the outside of a bend, so a hole placed too close to a bend line distorts into an oval as the part is formed. The part measures correctly flat and wrong afterward, which is a frustrating way to discover the issue.
Moving the hole away from the bend solves it. If the hole has to stay where it is, the alternative is forming first and cutting the hole afterward, which adds an operation. Flanges that are too short to clamp create a similar problem, since a press brake needs enough material to hold. Bends running very close to each other can also conflict, because the tooling and the already-formed portion of the part need somewhere to go.
Can a Welder Physically Reach That Joint?
Access is the constraint most often missed in CAD, where a model can be assembled in an order no human hand could follow. A joint inside a closed box, a weld behind a flange, or a seam accessible only after another component blocks it all look fine on screen.
Two questions catch most of it. Can a torch reach this joint at a workable angle, and can the assembly be held in position while it is welded? Adding an access opening, splitting a component, or changing assembly order usually costs far less than the workaround required when the part arrives unweldable. It is also worth asking whether the weld is needed at all, since a single formed piece frequently replaces several welded ones.
Does the Material Choice Fight the Process?
Sometimes, and it shows up late. Material that work-hardens as it is formed behaves differently than material that does not. Springback varies by alloy, so a bend angle correct in one material needs different setup in another. Minimum bend radius depends on thickness and material together, and specifying a tighter radius than the material accepts cracks the outside of the bend.
Grain direction matters too, since bending parallel to the grain is harder on the material than bending across it. None of this requires a metallurgy background. It requires naming the material and thickness early enough that the process can be checked against it.
What Can You Standardize to Cut Cost?
Repetition is cheaper than variety, and most drawings carry more variety than the design requires.
Use one material thickness across an assembly where you can, rather than three that each need their own setup. Use a consistent hole size for fasteners of the same type, so one tool does the work. Use consistent bend radii, since each distinct radius may call for different tooling. Reuse a proven geometry rather than drawing a new one for a part doing the same job as an existing piece.
None of these change what the part does. All of them reduce what it takes to make it.
When Does Design for Manufacturability Save the Most Money?
Before the drawing is finalized, which is the part that gets skipped. Once a design is approved and released, changing it means revision cycles, re-approvals, and sometimes re-quoting, so the easy savings have already hardened into commitments.
A short review while the design is still soft costs almost nothing. A fabricator looking at a draft can flag the three features driving most of the cost, and in a lot of cases the fix is moving a hole, opening a tolerance, or changing a thickness. That is the whole argument for involving the shop early rather than sending a finished package and hoping.
Common Questions About Design for Manufacturability
Do I need a finished drawing to start the conversation?
No, and earlier is better. A sketch with dimensions and a description of what the part does is enough to catch the expensive decisions while they are still easy to change.
Will simplifying a design compromise the part?
It should not. The goal is removing requirements that were never functional, not weakening ones that are. Anything load-bearing or dimensionally critical stays where it needs to be.
Does this apply to one-off parts or only production runs?
Both, though the payoff scales with quantity. On a single part, the savings are usually in setups. On a production run, small per-part savings multiply.
What file formats are most useful?
A 3D model plus a dimensioned drawing covers most cases, with DXF for flat profiles. Send what you have rather than waiting until the package is complete.
Have a Design in Progress?
Send us your drawing or sketch, and we’ll flag what drives the cost before you finalize it.

What Is Press Brake Forming?
What is press brake forming? It is the process that turns a flat piece of sheet metal into a part with angles in it. A machine called a press brake clamps the sheet between a punch above and a die below, then presses the two together so the metal bends along a straight line. Repeat that a few times in the right places and a flat blank becomes a bracket, an enclosure, a channel, or a panel. Almost every fabricated metal part with a bend in it went through this step.
What Is Press Brake Forming Doing to the Metal?
The punch pushes the sheet down into the die, and the metal bends around the shape of the tooling. The outside of the bend stretches slightly and the inside compresses, which is why every bend has a radius rather than a sharp corner. That radius is a real dimension, not a rounding error, and it affects the finished size of the part.
Metal also has memory. When the pressure releases, the material springs back a little toward flat. Forming accounts for that by overbending slightly, and how much depends on the material and its thickness. This is why the same drawing bent in aluminum and in stainless needs different setups to land on the same angle.
What Parts Come Off a Press Brake?
More than most people expect. Mounting brackets and angle pieces. Enclosures and electrical boxes. Machine guards and panels. Structural channels and hat sections. Trays, pans, chutes, and hoppers. Countertop and cabinet edges that turn down or fold back on themselves. Anything with a flange, a lip, or a right angle that started life as flat stock.
Formed parts often replace welded assemblies. A single piece bent into a U shape is faster, cleaner, and stronger than three flat pieces welded together, which is why forming shows up early in the design of a well-made part.
Where Does Forming Fit in the Fabrication Sequence?
Usually second. The flat shape gets cut first, on a laser or a water jet, with hole locations and the outer profile already in place. Then the part is formed. Then it gets welded, machined, or assembled as the job requires.
That order matters, because holes and features are far easier to locate accurately on a flat sheet than on a part that has already been bent. It also means the flat pattern has to be drawn with the bends in mind, since the material consumed by each bend changes how big the blank needs to be.
What Affects Whether a Bend Comes Out Right?
Material and Thickness
Different metals bend differently. Stainless takes more force and hardens as it is worked. Aluminum bends easily but springs back more. Thickness changes the minimum radius the material will accept without cracking on the outside of the bend.
Bend Radius
Every bend has one, and specifying an unrealistically tight radius for the material and thickness is one of the more common issues on drawings. If a radius is not called out, the shop will use what the tooling and material support.
Grain Direction
Rolled sheet has a grain. Bending across it is more forgiving than bending along it, particularly on tighter radii, where bending parallel to the grain can crack the outside of the bend.
Hole and Feature Placement
Holes placed too close to a bend line distort as the metal stretches. Moving them a small distance away, or forming first and drilling after, avoids a part that measures fine on the flat and wrong once bent.
What Should You Send When You Request a Quote?
A drawing or DXF is the starting point, with the material and thickness called out. Bend angles and flange dimensions should be on it, along with any radius requirement you actually need held. Quantity matters, because setup cost spreads differently across one part than across two hundred.
If you have a 3D model, send that too. If you only have a sketch and a description of what the part has to do, that is still workable, and forming is one of the areas where a short conversation early saves a revision later.
Common Questions About Press Brake Forming
Is press brake forming the same as bending?
Bending is what happens, and press brake forming is how it happens. Roll forming, tube bending, and hand brakes all bend metal too. A press brake does it with a punch and die, which gives repeatable angles across a run of parts.
Can you form a part after it has been welded?
Sometimes, though it is usually harder and less accurate. Forming before welding is the normal sequence for good reason.
How tight can a bend be?
It depends on the material, the thickness, and the tooling. Every material has a point where the outside of a bend cracks rather than stretches. Send the drawing and we will confirm what your material supports.
Do you form one-off parts or only production runs?
Both. A single prototype and a full production order run through the same process. Quantity changes the per-part price, not whether the job is worth doing.
Have a Part to Form?
Send us your drawing or DXF, and we’ll follow up with a clear quote for press brake forming, fast.
MIG Welding vs. TIG Welding: What’s the Difference?
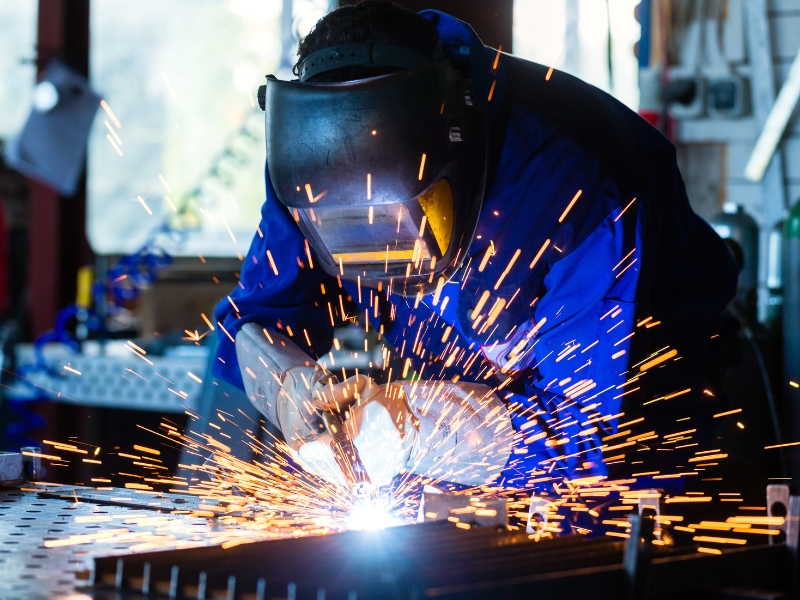
The short version of MIG welding vs TIG welding: MIG feeds a wire continuously and lays down metal fast, while TIG uses a non-consumable tungsten electrode and gives the welder precise control over a much smaller, cleaner weld. MIG is quicker and better suited to production work and thicker material. TIG is slower, more controlled, and the choice when the weld will be visible or the material is thin. Most shops run both, because most projects have some of each.
How Does MIG Welding Work?
A MIG gun feeds a spool of wire through the torch and into the joint while shielding gas protects the weld pool from the air. The wire is both the electrode and the filler, so the welder can keep moving without stopping to add material.
That continuous feed is what makes MIG fast. It deposits metal quickly, handles longer runs without interruption, and is more forgiving of variation in fit-up. On structural work, brackets, frames, enclosures, and anything where the weld will be ground, painted, or hidden, that speed translates directly into cost.
How Does TIG Welding Work?
TIG uses a tungsten electrode that does not melt into the weld. The arc heats the material, and the welder adds filler rod separately by hand, one dab at a time, while controlling heat input with a foot pedal or torch control.
Separating the heat source from the filler is the whole advantage. The welder controls exactly how much heat goes in and exactly how much metal is added, which produces a narrow, precise, clean weld with very little spatter. It is slower by nature, because control and speed are trading against each other.
What Do You Actually Notice in MIG Welding vs TIG Welding?
Appearance
TIG produces the stacked-dime bead people picture when they think of an attractive weld, with little spatter and minimal cleanup. MIG beads are wider and typically leave some spatter to clean up. If the weld will be seen on a finished product, that difference drives the decision on its own.
Price
MIG, clearly, on most work. Continuous wire feed and higher deposition mean fewer hours in the same joint. On a long run of structural welding, the difference is substantial. TIG costs more per inch of weld because it takes more time per inch.
Materials
MIG handles mild steel and stainless well and works on aluminum with the right setup. TIG handles stainless, aluminum, and thinner or more sensitive materials with more control, and it is the usual answer when the material is unforgiving or the joint is small.
Thickness
TIG, without much argument. Fine heat control is what keeps thin sheet from burning through or distorting. MIG puts more heat in faster, which is an advantage on heavy material and a liability on light gauge.
Which One Does Your Project Need?
Ask what the weld has to do. If it has to hold, be produced efficiently, and end up hidden or finished over, MIG is usually right. If it has to look good in the final product, sit on thin material, or hold tight distortion control, TIG earns its extra time.
For custom stainless work that will be seen, such as a countertop seam, a railing, or an exposed frame, TIG is generally the answer. For a run of brackets that get powder coated, MIG almost always is.
Why Would a Shop Use Both on One Job?
Because most assemblies have a mix of joints. The hidden structural welds inside a frame do not need the appearance of the visible seam on the outside, and paying for TIG time on both is wasted money. Choosing process by joint rather than by job is common practice, and it keeps cost down without giving up the finish where it matters.
Common Questions About MIG Welding vs TIG Welding
Is one stronger than the other?
A properly executed weld in either process can be plenty strong. Strength comes from joint design, fit-up, penetration, and welder skill far more than from which process was chosen.
Is TIG always better?
No. It is more controlled and better looking, and it costs more time. On a joint that will never be seen, that spend buys nothing you can use.
Which process should I ask for on a quote?
Describe what the finished part needs to look like and where it will be used, and let the shop recommend the process. Specifying it yourself can raise the price without improving the result.
Can both processes be used on stainless steel?
Yes. Both weld stainless routinely. TIG is more common where the weld stays visible, and post-weld finishing matters either way for both appearance and corrosion resistance.
Have a Welding Project?
Tell us what the part is and where the welds will be seen, and we’ll follow up with a clear quote, fast.
When to Use Water Jet Cutting for Metal Fabrication
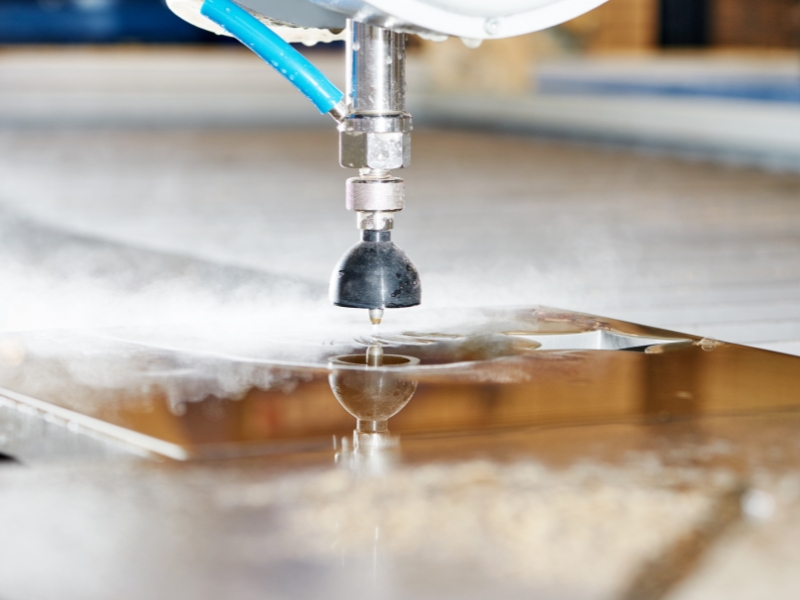
Knowing when to use water jet cutting comes down to reading a few signals in your own drawing. The process cuts with pressurized water and abrasive rather than heat, so it earns its place whenever heat would damage the part, the material is thick, the geometry is complicated, or the job involves something other than sheet metal. On thin steel in high volume, another process is usually faster and cheaper. Here is how to tell which situation you are in before you request a quote.
When to Use Water Jet Cutting: What You Should Look for in Your Drawing
Five things push a job toward water jet, and most parts that belong there show at least two of them. Run through your drawing and see how many apply.
Does Your Part Need to Stay Cool?
This is the strongest signal. Water jet cutting is a cold process, so there is no heat-affected zone along the edge and no change to the temper, hardness, or grain structure of the material next to the cut.
That matters on hardened and heat-treated material, where a thermal process can undo the treatment right where the part is most likely to be loaded. It matters on parts with critical requirements near the cut edge. And it matters on plastics, composites, and laminates that melt, char, or delaminate under heat. If your material was heat-treated on purpose, cutting it cold protects the work already done.
Is the Geometry Complicated?
Water jet cutting follows intricate profiles without tool wear changing the result partway through a run. Interior cutouts, tight radii, sharp interior corners, and nested shapes all cut cleanly, and the tenth part matches the first. There is no tooling to make, which is why one-off and short-run work with complex outlines often lands here even when the material would be easy to cut another way.
Is the Material Thick?
Thermal cutting processes lose speed and edge quality as material gets heavier. Water jet slows down as well, but the edge stays consistent, so on heavy plate it frequently becomes the practical choice even when another process could technically make the cut. If your part is plate rather than sheet, water jet is worth pricing.
Does the Job Involve More Than One Material?
Water jet cutting is close to material-agnostic. Stainless, aluminum, mild steel, copper, titanium, stone, glass, composite, rubber, and foam all run on the same machine. When a project includes gaskets alongside metal parts, or a stone or composite element next to a fabricated bracket, consolidating those cuts onto one process removes a vendor and a handoff from the schedule.
Does the Edge Need to Be Clean Off the Machine?
Water jet leaves a matte, sandblasted edge with very little burr, which often means no deburring step at all. On parts where secondary finishing would otherwise eat labor hours, that changes the total cost even when the cutting itself is slower. For stainless work in particular, an edge that needs no rework is worth quoting against a faster process that does.
Which Process is Right For You?
Being straight about this makes the rest of the guidance more useful. Water jet is not the answer for thin sheet metal in production volume, where thermal cutting is meaningfully faster and cheaper per part. It is not the answer when the part is simple, the material is ordinary, and quantity is high. And it is not the answer when a formed or machined feature would be a better way to get the geometry than cutting it.
If your job is thin, simple, high volume, and made of standard steel, price it both ways and let the numbers decide.
Common Questions About When to Use Water Jet Cutting
Does water jet cutting warp parts?
Not from heat, since none is introduced. That is one of the main reasons flat parts with tight flatness requirements are cut this way.
Will the cut edge need finishing?
Often not. The edge comes off matte with minimal burr. Whether it needs further work depends on the appearance standard the finished part has to meet.
Can water jet cut material that is already painted or coated?
Generally yes, since there is no heat to burn or blister a coating. Tell us about the coating when you request a quote so it factors into setup.
How do I know if my part is a water jet job?
Send the drawing with material, thickness, quantity, and any heat treatment or coating noted. Those details make the process choice obvious quickly.
Have a Part That Cannot Take Heat?
Send us your drawing or DXF, and we’ll follow up with a clear quote for water jet cutting, fast.

Laser Cutting vs. Water Jet Cutting: Which Process Fits Your Project?
Laser cutting vs water jet cutting is decided by heat more often than by anything else. A laser melts and blows material away, which is fast and precise but leaves a heat-affected zone along the cut. A water jet cuts cold, using pressurized water and abrasive, so the material next to the cut is unchanged. If your part cannot tolerate heat, the decision is already made. If it can, then thickness, edge finish, material type, and cost per part sort out the rest.
Does Laser Cutting vs Water Jet Cutting Come Down to Heat?
For a large share of jobs, yes. Laser cutting works by melting a narrow line through the material, which leaves a thin band along the edge where the metal was heated and cooled quickly. On most parts that band is irrelevant. On hardened or heat-treated material, on parts with tight requirements near the cut edge, and on some plastics and composites, it is not.
Water jet cutting removes material by erosion instead of melting, so nothing near the cut changes temper, hardness, or structure. That is the entire reason the process exists alongside laser rather than being replaced by it.
Water jet cutting removes material by erosion instead of melting, so nothing near the cut changes temper, hardness, or structure. That is the entire reason the process exists alongside laser rather than being replaced by it.
What Is the Difference in Edge Quality?
A laser edge on thin sheet is clean, square, and often ready to use as-is. As thickness increases, laser edges pick up more taper and dross, and secondary finishing becomes more likely.
A water jet edge comes off with a slightly matte, sandblasted texture and no burr worth mentioning. It stays consistent as thickness increases, though the cut can taper slightly on thicker material unless the machine compensates for it.
Which Process Handles Thicker Material?
Water jet, generally. Laser cutting is most efficient on thinner sheet and loses speed and edge quality as material gets thicker. Water jet cutting keeps working through much heavier plate, just more slowly. For thick stainless or aluminum plate, water jet is often the practical answer even when a laser could technically make the cut.
What Materials Can Each Process Cut?
Laser cutting is a metal process for most shops, and it handles reflective materials like aluminum and copper less readily than steel. Water jet cutting is close to material-agnostic. Metal, stone, glass, composite, rubber, and foam all cut on the same machine, which matters when a job involves something other than sheet metal.
For stainless specifically, both processes are used routinely, and the choice usually turns on thickness and whether the edge will be visible or further worked.
Which Is Faster and Cheaper Per Part?
On thin sheet in volume, laser cutting is generally faster and cheaper per part, and the gap widens as quantity climbs. Water jet runs slower and carries abrasive cost, which shows up on high-volume thin-gauge work.
That comparison flips on thick material, on parts that would need deburring or heat-affected material removed after lasering, and on short runs where setup dominates. Cost per part is the number to compare, not cost per hour.
How Precise Is Each Process?
Both are precise enough for the vast majority of fabricated parts. Laser holds a very narrow kerf, which helps on fine detail, small holes, and tight nesting. Water jet holds close tolerances too, with kerf width and taper as the factors to account for on intricate geometry. Neither is a limitation on typical fabrication work.
Which Process Fits Your Project?
Thin Sheet in Production Volume?
Laser, in most cases. Speed and cost per part favor it clearly, and edge quality on thin material is excellent straight off the machine.
Thick Plate or Heavy Profiles?
Water jet. It keeps a consistent edge through heavier material where laser performance falls off.
Heat-Sensitive or Hardened Material?
Water jet, without much debate. Cutting cold is the whole point, and it protects temper and hardness right up to the edge.
Non-Metal or Mixed-Material Jobs?
Water jet. Being able to cut stone, glass, composite, and metal on one machine consolidates jobs that would otherwise need two processes.
Common Questions About Laser Cutting vs Water Jet Cutting
Can one part use both processes?
Yes, and it happens on jobs where different features have different requirements. There is no rule that a single part has to be cut entirely one way.
Does the heat-affected zone actually matter on ordinary steel parts?
Usually not. It becomes a factor on hardened or heat-treated material, on parts with critical properties near the cut, and where a subsequent operation is sensitive to the condition of the edge.
Which one gives a better edge for a visible finished surface?
It depends on the look you want. A laser edge on thin material is crisp and square. A water jet edge is matte and uniform. Both can be finished further if the appearance has to match a specific standard.
How do I know which one my job needs?
Send the drawing along with the material, thickness, quantity, and anything the part has to survive afterward. Those four details settle it faster than a general comparison can.
Have a Part to Cut?
Send us your drawing or DXF, and we’ll follow up with a clear quote and the process that fits, fast.

Stainless Steel vs. Aluminum Fabrication: How to Choose the Right Material
Stainless steel vs aluminum fabrication usually comes down to four questions: does the part need to resist corrosion, how much does weight matter, how strong does it have to be, and what should it look like when it is finished? Aluminum is roughly a third as heavy as steel and easy to machine. Stainless is stronger, harder, and better under heat and abrasion. Both resist corrosion, but they do it by different mechanisms, and that difference decides more parts than any other factor on this list.
What Is the Core Difference Between Stainless Steel vs Aluminum Fabrication?
Both metals protect themselves with an oxide layer, and that is roughly where the similarity ends. Aluminum forms an oxide skin almost instantly on any fresh surface. Stainless relies on chromium in the alloy to form a passive layer that reforms when the surface gets scratched.
The practical result: aluminum handles ordinary outdoor exposure well and weighs very little, while stainless handles heat, abrasion, harsh chemicals, and sustained wet conditions better. Stainless is also noticeably heavier and costs more per pound in most grades.
Does Your Part Need to Resist Corrosion?
Both do, in different environments. Aluminum performs well in normal weather and is common in outdoor structural and enclosure work. It struggles where it contacts certain other metals, because galvanic corrosion becomes a factor, and it can pit in salty or highly alkaline conditions.
Stainless performs better in food contact, washdown areas, chemical exposure, and anywhere the part gets cleaned aggressively and often. If the part lives in a commercial kitchen, a lab, or a wet processing area, that usually settles the question by itself.
How Much Does Weight Matter?
Aluminum is about a third the density of steel, which matters more than it sounds. On anything lifted, carried, mounted overhead, shipped in volume, or moved as part of a machine, that difference changes the design and the cost of everything around it. On a fixed part that sits on the floor, it may not matter at all.
Which One Is Stronger?
Stainless is stronger and harder in absolute terms, so at a given thickness it carries more load and resists denting and abrasion better. Aluminum wins on strength-to-weight, which is why it dominates wherever mass is the constraint.
The honest answer for most parts is that either can be made strong enough. The real question is what you give up getting there: thickness and bulk with aluminum, or weight and cost with stainless.
How Will the Part Be Finished and Seen?
Stainless is usually left as the finished surface, with the grade of finish doing the visual work. Brushed, polished, and textured all read as intentional, which is why stainless shows up in visible architectural and food service work.
Aluminum is more often anodized, powder coated, or painted, which opens up color but adds a coating that can chip or fade. If the part has to be a specific color, aluminum gives you more room. If it needs to look like metal and keep looking like metal, stainless does that with no coating involved.
How Does Each Metal Behave in the Shop?
Cutting
Both cut cleanly on a laser or a water jet. Aluminum reflects laser energy more than steel does, which affects process selection on some jobs. Water jet cuts both without introducing heat.
Forming
Aluminum forms easily but springs back more, so bend allowances differ. Stainless takes more force to bend and work-hardens as it is formed, which affects tooling and the order of operations.
Aluminum Welding
Aluminum welding demands tighter control of heat input and cleanliness, since its oxide layer melts at a far higher temperature than the metal underneath. Stainless welds readily but distorts if heat is not managed, and welds often need finishing to restore both appearance and corrosion resistance.
Welding
Stainless generally costs more per pound than aluminum, though grade and market conditions move both. Material price is only part of the picture. Aluminum’s lighter weight cuts shipping and handling. Stainless often needs no coating, which removes a finishing step. A part that looks cheaper in raw material can land higher once processing and finishing are counted, so compare quoted parts rather than metal prices.
When Should You Just Send the Drawing?
When the part has competing requirements and no obvious winner, which is most of the time. Weight, strength, corrosion exposure, appearance, and budget rarely point the same direction, and the tradeoff is far easier to evaluate against a specific part than in the abstract. Send the drawing along with where the part will live and what it has to survive, and material selection turns into a short conversation instead of a research project.
Common Questions About Stainless Steel vs Aluminum Fabrication
Is aluminum cheaper than stainless steel?
Per pound, usually. Per finished part, not always, since coating, thickness, and processing all factor in. Quote the actual part rather than comparing raw material prices.
Which one holds up better outdoors?
Both do well. Aluminum is common and effective for general outdoor use. Stainless has the advantage in wet, salty, or frequently cleaned conditions, including near pools and lakefront property.
Can the two be used together in one assembly?
Yes, but contact between dissimilar metals can cause galvanic corrosion once moisture is present, so isolation or fastener selection has to be part of the design. Flag it early if your assembly mixes them.
Which is easier to repair or modify later?
Both can be cut, welded, and modified. Aluminum is easier to machine. Stainless is easier to return to its original appearance after a repair, since there is no coating to match.
Not Sure Which Material Fits?
Send us your drawing along with what the part has to survive, and we’ll follow up with a clear quote, fast.